In the end of tutorial for how to check voltage we spoke about batteries. Checking a battery with a multimeter might seem like something only experts should do, but the truth is, anyone can learn how.
Whether you’re trying to figure out why your flashlight won’t turn on, your car won’t start, or your remote control is acting up, knowing how to check a battery with a multimeter can save you time, money, and frustration.
Table of Contents
In this article titled “Multimeter How to Check a Battery,” we’ll walk you through everything you need to know in simple, easy-to-understand language. No technical jargon, no confusing terms—just clear instructions for complete beginners.
A battery powers many of the devices we use every day, from smartphones and laptops to flashlights, toys, and even cars. Over time, batteries lose their charge and eventually die. But sometimes, it’s hard to tell if a battery is truly dead or just needs a recharge.
This is where a multimeter comes in handy. A multimeter is a small, handheld tool that measures different electrical values, including voltage—the key factor in determining a battery’s health.
By checking the voltage of a battery, you can quickly find out whether it still has life left or if it’s time to toss it and grab a new one.
In this guide, “Multimeter How to Check a Battery,” we’ll explain exactly what a multimeter is, how it works, and how to use it step by step. You don’t need any prior experience or special tools—just a little patience and a willingness to learn.
We’ll also cover safety tips, common mistakes to avoid, and real-life examples of how to test different types of batteries, from AA and AAA cells to 9-volt batteries and even car batteries. So let’s get started and take the mystery out of battery testing!
What Is a Multimeter and Why Use It for Battery Testing?
A multimeter is a versatile electronic tool that allows you to measure various electrical properties such as measure voltage, measure capacitance, measure coils with mutimeter, measure diodes and resistance.
For the purposes of this article, “Multimeter How to Check a Battery,” our main focus will be on measuring voltage, which is the most straightforward and commonly used function when evaluating a battery’s condition.
Think of a multimeter as a digital detective—it helps you uncover whether a battery still holds a sufficient charge or if it’s too weak to power your device.
Batteries work by storing and releasing electrical energy, and the amount of energy they hold is measured in volts (V).
As google said Different types of batteries have different voltage ratings—for example, standard AA and AAA batteries are typically rated at 1.5 volts, while a 9-volt battery does exactly what its name suggests: provides 9 volts of power.
Car batteries, on the other hand, operate at around 12 volts. As a battery is used or sits unused over time, its voltage drops. If the voltage falls below a certain level, the battery can no longer provide enough power to operate a device effectively.
This is where a multimeter becomes invaluable. Instead of guessing whether a battery is still good or not, you can simply test it using a multimeter and get an accurate reading.
Some people rely on visual cues or trial-and-error methods—like putting a battery in a device and seeing if it works—but these approaches can be misleading.
A seemingly dead battery might still have some charge left, and a battery that looks fine could be completely drained. Using a multimeter eliminates guesswork and gives you precise data about the battery’s current state.
There are two main types of multimeters available today: analog and digital. Analog multimeters use a needle and dial system to display readings, while digital multimeters feature an LCD screen that shows numerical values.
Digital models are more popular among beginners because they are easier to read and often come with auto-ranging functions, meaning they automatically select the appropriate measurement scale.
This makes them especially user-friendly, which is perfect for those following along in this guide, “Multimeter How to Check a Battery.”
Multimeters deals for battery testing
Preparing Your Multimeter for Battery Testing
Before you begin checking a battery, it’s important to set up your multimeter correctly. This ensures both accurate readings and your personal safety. Start by locating the dial or selection knob on your multimeter.
This is usually found near the center of the device and allows you to choose what type of measurement you want to take—in this case, voltage. Since batteries provide direct current (DC), you need to set your multimeter to the DC voltage setting.
On most digital multimeters, this is marked with a capital “V” followed by a straight line or dashed line above it (often labeled as V– or V⎓).
Next, insert the test leads into the correct ports on your multimeter. Test leads are the two colored wires—one red and one black—that connect to the battery you’re testing. The black lead should always go into the port labeled “COM,” which stands for common.
This is your reference point. The red lead goes into the port labeled “VΩmA” or something similar, which is designated for measuring voltage, resistance, and small amounts of current.
Some multimeters have a separate high-current port labeled “10A,” but for battery testing, you should never use this port. Using the wrong port can cause internal damage to the multimeter, so always verify the placement of your leads before taking any measurements.
If your multimeter does not have an auto-ranging function, you’ll need to manually select the voltage range. Ranging refers to the maximum value your multimeter can measure within a given setting.
For example, if you set your multimeter to 20V DC, it can accurately measure voltages up to 20 volts. To avoid an overload warning, start with a higher range than expected and adjust downward if necessary.
Once everything is set up correctly, you’re ready to proceed with actually measuring the battery’s voltage, which we’ll cover in the next section of this guide, “Multimeter How to Check a Battery.”
Step-by-Step Instructions: How to Check a Battery with a Multimeter
Now that your multimeter is properly set up, it’s time to test your first battery. This section of “Multimeter How to Check a Battery” will walk you through the process in clear, easy-to-follow steps.
Let’s start with a standard AA or AAA battery, as these are among the most commonly used household batteries and provide a great introduction to the process.
Begin by holding the battery in one hand and positioning the multimeter probes in the other. Remember, the black probe should already be plugged into the COM port, and the red probe into the voltage port (usually labeled VΩmA).
With the battery in front of you, gently touch the black probe to the flat end of the battery—the negative terminal—and the red probe to the raised bump on the other end—the positive terminal.
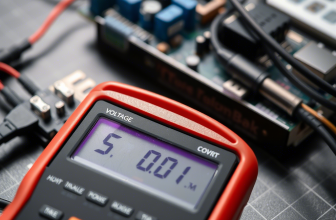
Make sure the probes maintain firm contact with the battery’s metal surfaces. At this point, the multimeter’s display should light up and show a numerical value.
For a fresh AA or AAA battery, you should expect a reading around 1.5 volts. If the number is slightly lower, such as 1.3 or 1.4 volts, the battery may still be usable but nearing the end of its life. If the reading is significantly below 1.2 volts, it’s likely time to replace the battery.
This same method applies to other battery types, including C, D, and 9-volt batteries, although their expected voltages will differ.
For instance, a new 9-volt battery should read close to 9.6 volts. Keep in mind that slight variations in readings are normal depending on the battery’s condition and the multimeter’s precision.
Let’s try another example: testing a car battery. Car batteries operate at around 12 volts, making them ideal for demonstrating how to check larger batteries.
Begin by turning off the vehicle’s ignition and opening the hood to access the battery terminals.
Set your multimeter to DC voltage and place the red probe on the positive terminal (marked with a plus sign) and the black probe on the negative terminal (marked with a minus sign). The display should immediately show a voltage reading.
A healthy 12-volt car battery should read around 12.6 volts when the engine is off. If the reading drops below 12 volts, the battery may be weak or discharged and might need charging or replacement.
If the voltage is extremely low (below 11.8 volts), it’s possible the battery is completely dead and unable to hold a charge.
As you practice measuring battery voltage, keep in mind that consistency and proper technique are key to obtaining accurate results.
Ensure that the probes make solid contact with the battery terminals, avoid touching any exposed metal parts with your hands, and always double-check your multimeter settings before taking a measurement.
By following these simple guidelines, you’ll quickly become comfortable with the process described in this section of “Multimeter How to Check a Battery.”
Understanding and Interpreting Battery Voltage Readings
Once you’ve taken a battery measurement, the next step is understanding what the numbers on your multimeter mean. In this part of “Multimeter How to Check a Battery,” we’ll break down how to interpret the readings you see on the display and what they signify about the battery’s condition.
While the exact appearance of the display may vary slightly depending on your multimeter model, most digital versions will show a numerical value followed by a unit of measurement—typically volts (V).
Let’s start with alkaline batteries, such as AA, AAA, C, and D cells. These are the most common types of disposable batteries used in everyday devices like remotes, flashlights, and toys. A brand-new AA or AAA battery should read close to 1.5 volts.
However, as the battery is used or ages, its voltage gradually decreases. If your multimeter shows a reading between 1.3 and 1.5 volts, the battery still has a decent amount of charge left and can continue to power low-drain devices like clocks or remote controls.
If the reading drops below 1.3 volts, the battery is considered weak and may struggle to power more demanding electronics like digital cameras or game controllers. Anything below 1.1 volts means the battery is nearly depleted and should be replaced.
Rechargeable batteries, such as nickel-metal hydride (NiMH) and nickel-cadmium (NiCd) varieties, behave slightly differently. These batteries typically have a nominal voltage of 1.2 volts when fully charged.
A reading between 1.2 and 1.4 volts indicates a strong charge, while anything below 1.0 volts suggests the battery needs recharging. Unlike disposable alkaline batteries, rechargeables can be restored to full capacity with the right charger, making them a cost-effective and environmentally friendly option.
However, if a rechargeable battery consistently fails to hold a charge or reads significantly below 1.0 volts even after being charged, it may be worn out and require replacement.
Another common battery type you might encounter is the 9-volt battery, often used in smoke detectors, radios, and guitar pedals. A fresh 9-volt battery should read around 9.6 volts.
If your multimeter shows a reading between 9.0 and 9.6 volts, the battery is still in good condition. However, if the voltage drops below 9.0 volts, it’s best to replace it, especially in critical applications like smoke alarms where reliability is essential.
When testing car batteries, the expected voltage is much higher—around 12.6 volts when the engine is off. A reading between 12.4 and 12.6 volts indicates a fully charged battery, while anything between 12.0 and 12.4 volts suggests a partially discharged state.
If the voltage drops below 12.0 volts, the battery may struggle to start the vehicle and should be tested further or recharged. Anything below 11.8 volts typically means the battery is completely discharged and may no longer hold a charge effectively.
It’s also important to note that minor fluctuations in readings are normal and don’t necessarily indicate a problem. Environmental factors, battery age, and the quality of your multimeter can all influence the precision of the measurement.
As long as the reading stays within an expected range for the battery type you’re testing, there’s generally nothing to worry about. With this knowledge, you’ll be better equipped to assess whether the batteries you’re measuring are in good working order or in need of replacement.
Common Mistakes and Safety Tips When Checking Batteries
While checking a battery with a multimeter is generally safe when done correctly, there are some common mistakes that beginners often make. One of the most frequent errors is selecting the wrong measurement mode.
For example, trying to measure current while the multimeter is set to voltage can result in inaccurate readings or even damage the device. Similarly, using the AC voltage setting when measuring DC voltage—or vice versa—can lead to confusion or incorrect results.
Always double-check your multimeter’s dial position before taking any measurement, especially if you’ve recently used it for a different task.
Another mistake many newcomers make is inserting the test leads into the wrong ports. Most multimeters have multiple input jacks, including one for voltage and resistance (usually labeled VΩmA) and another for high-current measurements (often labeled 10A).
If you accidentally plug the red lead into the 10A port while measuring battery voltage, you risk damaging the multimeter. Always ensure the leads are correctly positioned based on the type of measurement you’re performing.
Additionally, failing to use the black lead as a reference point by connecting it to the COM port can lead to erratic readings or no reading at all.
One of the most critical aspects of using a multimeter safely is avoiding contact with live electrical components unnecessarily. Even when measuring low-voltage batteries, it’s a good idea to handle the test leads carefully and avoid touching exposed metal parts with your fingers.
Wearing insulated gloves can further reduce the risk of accidental short circuits, especially when working with car batteries, which store significantly more power than smaller household cells.
Never attempt to measure voltage in high-power industrial systems unless you have proper training and protective equipment.
If you’re unsure about the safety of a particular electrical setup, it’s always best to consult a qualified professional rather than experimenting on your own.
Lastly, neglecting to turn off the multimeter after use can drain the internal battery over time. Most digital multimeters do not have an automatic shut-off feature, so developing the habit of switching the device off when you’re finished will help prolong its lifespan.
By being mindful of these common pitfalls and following basic safety precautions, you can ensure that every battery check you perform is both accurate and secure.
Troubleshooting Battery Problems with Your Multimeter
Now that you know how to check a battery and interpret the readings, let’s explore how to use this knowledge for troubleshooting common issues.
In this section of “Multimeter How to Check a Battery,” we’ll walk through real-world scenarios where measuring voltage can help identify problems in everyday devices.
Whether you’re dealing with a malfunctioning flashlight, a dead car battery, or an unresponsive toy, a multimeter can be a powerful diagnostic tool.
Let’s start with a simple example: a flashlight that refuses to turn on. Before assuming the bulb is burned out or the switch is faulty, use your multimeter to check the battery’s voltage. Set your multimeter to DC voltage and place the red probe on the positive end of the battery and the black probe on the negative end.
If the battery reads close to its rated voltage (e.g., 1.5V for a AA battery), the problem may lie elsewhere in the flashlight’s circuitry. However, if the voltage is significantly lower than expected, the battery is likely the culprit. Replacing it with a fresh one might be all you need to restore functionality.
Another common scenario involves a car that won’t start. While there are many potential causes, a dead battery is one of the most frequent. To check your car battery’s voltage, turn off the ignition and open the hood.
Set your multimeter to DC voltage and place the red probe on the positive terminal and the black probe on the negative terminal. A healthy 12V car battery should read around 12.6V when the engine is off. If the reading drops below 12V, the battery may be weak or discharged and might need charging or replacement.
If the voltage is extremely low (below 11.8V), it’s possible the battery is completely dead and unable to hold a charge. In such cases, jump-starting the vehicle might temporarily help, but replacing the battery is likely necessary for a permanent fix.
Household electronics can also benefit from battery checks. Imagine a wireless mouse or keyboard that suddenly stops responding. Instead of immediately assuming the device is broken, grab your multimeter and test the batteries inside.
If the voltage is significantly below the expected level, replacing the batteries might be all that’s needed to restore functionality.
This same approach applies to remote controls, game controllers, and even children’s toys—making your multimeter a valuable tool for diagnosing and resolving everyday battery-related issues.
By systematically checking battery voltage in different devices, you can isolate the source of the problem and avoid unnecessary replacements.
Whether you’re troubleshooting electronics, automotive systems, or household gadgets, knowing how to check a battery gives you a valuable advantage in diagnosing and resolving electrical issues efficiently.
Expanding Your Battery Testing Skills: Beyond Basic Checks
Now that you’ve mastered the fundamentals of checking a battery with a multimeter, you can begin exploring additional ways to use your tool for more advanced diagnostics.
In this final section of “Multimeter How to Check a Battery,” we’ll introduce a few practical applications that build upon your newfound skills, helping you get the most out of your multimeter.
While voltage measurement is an essential starting point, your multimeter can also assist with checking battery load, testing rechargeable batteries, and even identifying battery drain issues in vehicles.
One particularly useful skill is learning how to test a battery under load. Measuring voltage without a load can give you a general idea of a battery’s condition, but sometimes a battery may appear fine at rest yet fail when asked to deliver power.
To test a battery under load, you can either use a dedicated battery load tester or simulate a load by briefly powering a small device while measuring voltage.
For example, when testing a AA battery, you can connect it to a small LED flashlight and measure the voltage while the light is on.
If the voltage drops significantly (for example, from 1.5V to 1.1V) under load, the battery may not be able to supply consistent power and should be replaced.
Testing rechargeable batteries follows a similar process but requires attention to their specific chemistry. Nickel-metal hydride (NiMH) and lithium-ion (Li-ion) batteries behave differently from alkaline cells, and their voltage levels fluctuate depending on charge state.
NiMH batteries typically have a nominal voltage of 1.2V, meaning a fully charged cell will read around 1.4V and drop closer to 1.0V when depleted.
Lithium-ion batteries, commonly found in smartphones and laptops, have a higher nominal voltage of 3.7V and should read around 4.2V when fully charged.
Monitoring these voltage ranges helps determine whether rechargeable batteries are holding their charge effectively or if they need replacement.
Another valuable application is identifying parasitic battery drain in vehicles. Sometimes, a car battery dies unexpectedly due to a hidden electrical draw, even when the engine is off.
To check for this, set your multimeter to measure DC current (amps) and connect it in series between the negative battery terminal and the disconnected cable. A normal parasitic draw should be less than 50 milliamps (0.05A).
If the reading is significantly higher, something in the vehicle is drawing excessive power when it shouldn’t be, potentially draining the battery overnight.
This technique requires extra caution, as measuring current incorrectly can damage the multimeter, so always follow proper setup procedures.
By expanding your battery testing techniques beyond simple voltage checks, you gain a more comprehensive toolkit for diagnosing and repairing battery-related problems.
Whether you’re verifying battery performance under load, assessing rechargeable cells, or tracking down electrical drains in vehicles, these additional skills enhance your ability to troubleshoot effectively.
With consistent practice and exploration, your multimeter will become an indispensable companion in both everyday fixes and more complex electronic projects.