If you know already how to measure current with a multimeter and how to measure voltage with multimeter. Check voltage with a multimeter may seem intimidating at first.
But once you grasp the fundamentals, it’s actually straightforward and incredibly useful. Whether you’re diagnosing a household electrical problem or tackling an electronics project, understanding how to check voltage safely and precisely is a vital skill to have.
Table of Contents
In this guide, “Multimeter How to Check Voltage,” we’ll take you through everything you need to know, step by step, using clear and straightforward language. You don’t need to be an electrician or a technical expert—just bring your curiosity and a willingness to learn.
A multimeter is a handy, all-in-one tool used to measure electrical properties like voltage, current, and resistance. Among these, checking voltage is one of the most common and practical uses.
Voltage represents the electrical pressure that drives current through a circuit. Measuring it can help you figure out if a battery still has power, if an outlet is working properly, or if a specific part of an electronic device is getting the voltage it needs.
Before we dive into how to do this, it’s important to understand what voltage actually is and why it’s worth measuring.
This article is designed with beginners in mind—especially those who have never used a multimeter before. We’ll start with the basics, explain key terms in everyday language, and walk you through each step of the voltage measurement process safely and confidently.
We’ll also cover different types of multimeters, how to get them set up, and how to read and understand your results. So let’s get started by understanding what a multimeter is and why it’s such an essential tool for checking voltage.
What Is a Multimeter and Why Use It?
A multimeter is a handheld device used to measure various electrical values, making it an essential tool for anyone dealing with electrical circuits, batteries, or electronic components.
As the name suggests, it combines multiple measurement functions into one compact unit. Most standard multimeters can measure voltage, current, and resistance, though some advanced models offer additional features like capacitance, frequency, and temperature measurements.
For our purposes in this article, “Multimeter How to Check Voltage,” we will focus primarily on the voltage-measuring capability, which is one of the most commonly used functions.
Voltage, often represented by the letter “V,” refers to the electric potential difference between two points in a circuit. In simpler terms, it indicates how much electrical pressure is pushing electrons through a conductor.
Measuring voltage helps determine whether a power source is delivering the correct amount of energy, if a circuit is functioning properly, or if a component has failed.
Without a multimeter, identifying electrical problems would require guesswork, which can be both frustrating and potentially dangerous. That’s why having a basic understanding of how to check voltage with a multimeter is so valuable.
There are two main types of multimeters: analog and digital. Analog multimeters use a needle and dial system to display readings, while digital multimeters feature an LCD screen that provides precise numerical values.
Digital multimeters are more popular today due to their accuracy, ease of use, and built-in safety features. Many even come with automatic ranging, meaning they can select the appropriate measurement scale on their own.
This makes them especially beginner-friendly, which is ideal for those following along in this guide, “Multimeter How to Check Voltage.”
Preparing Your Multimeter for Voltage Measurement
Before you begin checking voltage, it’s important to make sure your multimeter is set up correctly. This step ensures both accurate readings and your personal safety.
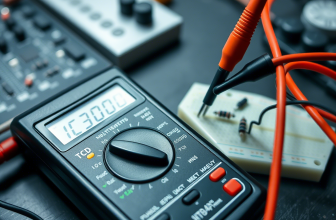
First, locate the dial or selection knob on your multimeter. This is usually found near the center of the device and allows you to choose what type of measurement you want to take—in this case, voltage.
Since there are two main types of voltage you might encounter—direct current (DC) and alternating current (AC)—you need to select the appropriate setting. DC voltage is typically used in batteries and electronic devices, while AC voltage powers household outlets and appliances.
On most digital multimeters, you’ll find symbols indicating these settings. The DC voltage setting is usually marked with a capital “V” followed by a straight line or dashed line above it (often labeled as V– or V⎓⎓), whereas the AC voltage setting is represented by a capital “V” with a wavy line above it (often labeled as V~).
If you’re unsure which type of voltage you’re measuring, consider where the electricity is coming from. For example, a AA battery uses DC voltage, while a standard wall outlet delivers AC voltage.
Always double-check your selection before proceeding, as choosing the wrong setting can lead to incorrect readings or even damage the multimeter.
Next, insert the test leads into the correct ports on your multimeter. Test leads are the two colored wires—one red and one black—that connect to the device you’re testing. The black lead should always go into the port labeled “COM,” which stands for common.
This is your reference point. The red lead goes into the port labeled “VΩmA” or something similar, which is designated for measuring voltage, resistance, and small amounts of current.
Some multimeters have a separate high-current port labeled “10A,” but for voltage measurements, you should never use this port. Using the wrong port can cause internal damage to the multimeter, so always verify the placement of your leads before taking any measurements.
If your multimeter does not have an auto-ranging function, you’ll need to manually select the voltage range. Ranging refers to the maximum value your multimeter can measure within a given setting.
For example, if you set your multimeter to 20V DC, it can accurately measure voltages up to 20 volts. If you attempt to measure a higher voltage than the selected range, the display may show an overload symbol (usually “OL”) instead of a reading.
To avoid this, start with a higher range and work your way down if needed. Once everything is set up correctly, you’re ready to proceed with actually measuring voltage, which we’ll cover in the next section of this guide, “Multimeter How to Check Voltage.”
Multimeters offers and deals
Step-by-Step Instructions: How to Check Voltage with a Multimeter
Now that your multimeter is properly set up, it’s time to take your first voltage measurement. This section of “Multimeter How to Check Voltage” will walk you through the process in clear, easy-to-follow steps.
Let’s start with a simple example: checking the voltage of a standard AA battery. This is a great exercise because batteries provide direct current (DC) voltage, making them a safe and straightforward option for beginners.
Begin by holding the battery in one hand and positioning the multimeter probes in the other. Remember, the black probe should already be plugged into the COM port, and the red probe into the voltage port (usually labeled VΩmA).
With the battery in front of you, gently touch the black probe to the flat end of the battery—the negative terminal—and the red probe to the raised bump on the other end—the positive terminal.
Make sure the probes maintain firm contact with the battery’s metal surfaces. At this point, the multimeter’s display should light up and show a numerical value.
For a fresh AA battery, you should expect a reading around 1.5 volts. If the number is slightly lower, such as 1.3 or 1.4 volts, the battery may still be usable but nearing the end of its life. If the reading is significantly below 1.2 volts, it’s likely time to replace the battery.
This same method applies to other battery types, including AAA, C, D, and 9-volt batteries, although their expected voltages will differ. For instance, a new 9-volt battery should read close to 9.6 volts.
Keep in mind that slight variations in readings are normal depending on the battery’s condition and the multimeter’s precision.
Let’s try another example: measuring the voltage from a household wall outlet. This involves alternating current (AC), so the setup is slightly different. Begin by turning the multimeter’s dial to the AC voltage setting, which is typically marked with a wavy line (~) after the “V.”
Unlike DC voltage, AC voltage doesn’t have a fixed polarity, so the color of the probes doesn’t matter in this case. Carefully insert the probes into the two vertical slots of the outlet—one probe into each slot.
The display should immediately show a voltage reading. In most North American homes, a standard outlet supplies around 120 volts AC, though readings between 110 and 130 volts are considered normal.
If the reading is significantly outside this range, it could indicate an electrical issue that requires professional attention.
As you practice measuring voltage, keep in mind that consistency and proper technique are key to obtaining accurate results.
Ensure that the probes make solid contact with the test points, avoid touching any exposed metal parts with your hands, and always double-check your multimeter settings before taking a measurement.
By following these simple guidelines, you’ll quickly become comfortable with the process described in this section of “Multimeter How to Check Voltage.”
Understanding and Interpreting Voltage Readings
Once you’ve taken a voltage measurement, the next step is understanding what the numbers on your multimeter mean. In this part of “Multimeter How to Check Voltage,” we’ll break down how to interpret the readings you see on the display and what they signify about the device or circuit you’re testing.
While the exact appearance of the display may vary slightly depending on your multimeter model, most digital versions will show a numerical value followed by a unit of measurement—typically volts (V).
Let’s start with DC voltage readings, which you might encounter when testing batteries or electronic devices. Suppose you measured a AA battery and saw a reading of 1.5 V. This means the battery is fully charged and functioning properly.
If the reading is slightly lower, such as 1.4 V or 1.3 V, the battery still has some charge left but may soon need replacing. If the voltage drops below 1.2 V, the battery is likely depleted and no longer effective.
Similarly, when measuring a 9V battery, a reading of 9.6 V is normal for a brand-new battery, while anything below 8 V suggests it needs to be replaced. These small fluctuations are perfectly natural and depend on the battery’s chemistry and age.
When measuring AC voltage, such as from a wall outlet, the reading should align with your local power supply standards. In the United States, a typical household outlet delivers around 120 V AC, though readings between 110 V and 130 V are considered acceptable due to normal fluctuations in the electrical grid.
If you measure an outlet and the reading falls within this range, the outlet is functioning correctly. However, if the voltage is significantly higher or lower—for example, only 90 V or over 140 V—it could indicate an electrical problem that may affect connected devices.
In such cases, it’s best to consult a licensed electrician rather than attempting further troubleshooting yourself.
Another thing you might encounter when interpreting readings is an “OL” symbol on the display. This stands for “Overload” and appears when the voltage you’re measuring exceeds the selected range on your multimeter.
For instance, if you set your multimeter to 20 V DC but try to measure a 120 V AC outlet, the display will show “OL” because the voltage is too high for that setting. To resolve this, simply adjust the multimeter’s dial to a higher voltage range and try again.
Some modern multimeters have auto-ranging capabilities, which automatically detect and display the correct voltage without requiring manual adjustments. If your multimeter has this feature, you won’t see an overload warning unless the voltage exceeds the device’s maximum limit, which is typically several hundred volts.
It’s also important to note that minor variations in readings are normal and don’t necessarily indicate a problem. Environmental factors, battery condition, and the quality of your multimeter can all influence the precision of the measurement.
As long as the reading stays within an expected range for the component or power source you’re testing, there’s generally nothing to worry about.
With this knowledge, you’ll be better equipped to assess whether the voltage levels you’re measuring are within acceptable limits, allowing you to make informed decisions about your electrical equipment.
Common Mistakes and Safety Tips When Checking Voltage
While checking voltage with a multimeter is generally safe when done correctly, there are some common mistakes that beginners often make. One of the most frequent errors is selecting the wrong measurement mode.
For example, trying to measure current while the multimeter is set to voltage can result in inaccurate readings or even damage the device. Similarly, using the AC voltage setting when measuring DC voltage—or vice versa—can lead to confusion or incorrect results.
Always double-check your multimeter’s dial position before taking any measurement, especially if you’ve recently used it for a different task.
Another mistake many newcomers make is inserting the test leads into the wrong ports. Most multimeters have multiple input jacks, including one for voltage and resistance (usually labeled VΩmA) and another for high-current measurements (often labeled 10A).
If you accidentally plug the red lead into the 10A port while measuring voltage, you risk damaging the multimeter. Always ensure the leads are correctly positioned based on the type of measurement you’re performing.
Additionally, failing to use the black lead as a reference point by connecting it to the COM port can lead to erratic readings or no reading at all.
One of the most critical aspects of using a multimeter safely is avoiding contact with live electrical components unnecessarily. Even when measuring household voltage, it’s essential to handle the test leads carefully and avoid touching exposed metal parts with your fingers.
Wearing insulated gloves and keeping your workspace dry can further reduce the risk of electric shock. Never attempt to measure voltage in high-power industrial systems unless you have proper training and protective equipment.
If you’re unsure about the safety of a particular electrical setup, it’s always best to consult a qualified electrician rather than experimenting on your own.
Lastly, neglecting to turn off the multimeter after use can drain the internal battery over time. Most digital multimeters do not have an automatic shut-off feature, so developing the habit of switching the device off when you’re finished will help prolong its lifespan.
By being mindful of these common pitfalls and following basic safety precautions, you can ensure that every voltage check you perform is both accurate and secure.
Troubleshooting Voltage Issues with Your Multimeter
Now that you know how to check voltage and interpret the readings, let’s explore how to use this knowledge for troubleshooting common electrical problems. In this section of “Multimeter How to Check Voltage,” we’ll walk through real-world scenarios where measuring voltage can help identify issues in everyday devices and circuits.
Whether you’re dealing with a malfunctioning flashlight, a dead car battery, or an unresponsive appliance, a multimeter can be a powerful diagnostic tool.
Let’s start with a simple example: a flashlight that refuses to turn on. Before assuming the bulb is burned out or the switch is faulty, use your multimeter to check the battery’s voltage. Set your multimeter to DC voltage and place the red probe on the positive end of the battery and the black probe on the negative end.
If the battery reads close to its rated voltage (e.g., 1.5V for a AA battery), the problem may lie elsewhere in the flashlight’s circuitry. However, if the voltage is significantly lower than expected, the battery is likely the culprit.
Replacing it with a fresh one might be all you need to restore functionality. You can also read details about how a battery works to understand more clearly.
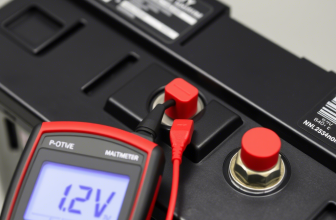
Another common scenario involves a car that won’t start. While there are many potential causes, a dead battery is one of the most frequent. To check your car battery’s voltage, turn off the ignition and open the hood.
Set your multimeter to DC voltage and place the red probe on the positive terminal and the black probe on the negative terminal. A healthy 12V car battery should read around 12.6V when the engine is off.
If the reading drops below 12V, the battery may be weak or discharged and might need charging or replacement. If the voltage is extremely low (below 11.8V), it’s possible the battery is completely dead and unable to hold a charge.
In such cases, jump-starting the vehicle might temporarily help, but replacing the battery is likely necessary for a permanent fix.
Household appliances can also benefit from voltage checks. Imagine a lamp that suddenly stops working. Instead of immediately disassembling the fixture, grab your multimeter and test the outlet first.
Set your multimeter to AC voltage and insert the probes into the outlet slots. If the reading is within the normal range (around 120V in most North American homes), the problem isn’t with the power supply.
Next, test the lamp’s socket by placing one probe on the metal tab at the bottom of the socket and the other on the threaded side.
If there’s no voltage reading, the internal wiring might be faulty. However, if the socket shows proper voltage, the issue could be a burned-out bulb or a defective switch.
By systematically checking voltage at different points in a circuit, you can isolate the source of the problem and avoid unnecessary replacements.
Whether you’re troubleshooting electronics, automotive systems, or household appliances, knowing how to check voltage gives you a valuable advantage in diagnosing and resolving electrical issues efficiently.
Expanding Your Multimeter Skills: Beyond Basic Voltage Checks
Now that you’ve mastered the fundamentals of checking voltage, you can begin exploring additional ways to use your multimeter for more advanced diagnostics. In this final section of “Multimeter How to Check Voltage,” we’ll introduce a few practical applications that build upon your newfound skills, helping you get the most out of your tool.
While voltage measurement is an essential starting point, your multimeter can also assist with checking continuity, testing fuses, and measuring resistance—all of which are valuable skills for troubleshooting electrical and electronic systems.
One particularly useful function is continuity testing, which determines whether a circuit is complete or broken. This is especially helpful when diagnosing faulty switches, blown fuses, or damaged wiring.
To perform a continuity test, turn the multimeter’s dial to the continuity setting—often indicated by a diode symbol or a sound wave icon. Touch the probes to both ends of the component you’re testing (such as a fuse or wire).
If the circuit is continuous, the multimeter will emit a beep, confirming that electricity can flow freely. If there’s no beep, the circuit is interrupted somewhere, meaning the component is likely defective. This simple test can save you time and effort when tracking down electrical issues.
Testing fuses is another common application that builds on your voltage-checking knowledge. Fuses are safety devices designed to break the circuit if excessive current flows through them.
A blown fuse will prevent electricity from passing through, causing a device to stop working. To test a fuse, remove it from its holder and set your multimeter to continuity mode. Place a probe on each end of the fuse.
If the multimeter beeps, the fuse is intact and functioning properly. If there’s no beep, the fuse has blown and needs replacement. This method works for both small glass fuses found in electronics and larger ceramic fuses used in appliances.
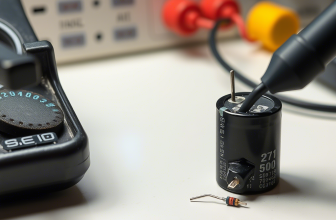
Measuring resistance is another valuable function that complements voltage checks. Resistance, measured in ohms (Ω), indicates how much a component restricts the flow of electricity.
Knowing how to measure resistance helps identify faulty resistors, damaged wires, or malfunctioning sensors. To measure resistance, turn the multimeter dial to the ohms setting and connect the probes to the component you’re testing.
Keep in mind that resistance measurements should be taken when the component is disconnected from the circuit to avoid interference from other electrical pathways.
If the reading matches the expected resistance value listed on the component, it’s in good condition. If the reading is significantly off or shows infinite resistance (displayed as “OL”), the component may be faulty.
By expanding your multimeter usage beyond voltage checks, you gain a more comprehensive toolkit for diagnosing and repairing electrical problems.
Whether you’re verifying continuity, testing fuses, or measuring resistance, these additional skills enhance your ability to troubleshoot effectively.
With consistent practice and exploration, your multimeter will become an indispensable companion in both everyday fixes and more complex electronic projects.